Signed distance functions in 46 lines of Python
Signed distance functions are a really cool method of 3D rendering! But they unfortunately have a reputation for being difficult to understand. It makes sense why—they usually get shown off in beautiful, but complicated ShaderToy examples written in GLSL, an unfamiliar language for most programmers1. But at their core, SDFs are a really simple idea. I'm going to prove that by walking you through a program that raymarches an animated SDF donut in only 46 lines of Python. Just for fun, and to make it easy to port to your favorite language that can also print strings to the terminal, we'll also be doing it with ASCII art instead of a graphics API. So come along! By the end, you won't just have this delicious-looking spinning ASCII donut, but an understanding of a cool rendering technique you can use for all kinds of neat things.
 Setting up
So to start off with, let's slap down some Python to render our ASCII frame. We'll also add in a game loop so we can do animation:
import time

def sample(x: int, y: int) -> str:
  # draw an alternating checkboard pattern
  if (x + y + int(time.time())) % 2:
    return '#'
  else:
    return ' '

while True:
  # loop over each position and sample a character
  frame_chars = []
  for y in range(20):
    for x in range(80):
      frame_chars.append(sample(x, y))
    frame_chars.append('\n')
  # print out a control sequence to clear the terminal, then the frame.
  # important note! if you're using windows, see the note below.
  print('\033[2J' + ''.join(frame_chars))
  # cap at 30fps
  time.sleep(1/30)
Note for windows users: the above code needs to be slightly tweaked.
You'll need to add
import os; os.system("")as the first line. This will enable ANSI escape sequences.You'll also need to replace the
print('\033[2J'above withprint('\033[H', keeping the rest of the line the same.The other examples below also need the same modifications. Thanks to Cole Hunter for pointing this out!
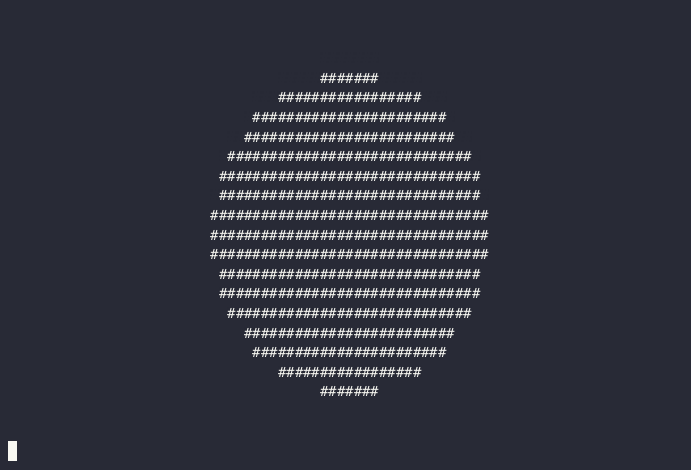
This renders a 80x20 checkerboard, which alternates every second:
This is a nice foundation, but not too visually interesting, so let's move on. The task ahead is simple: for each character on the screen, decide what the character should be—easy! :-)
Drawing a circle
Let's start with something simple.
We have an x and a y coordinate, so we can easily draw a circle, if not anything 3D yet.
There's a few different ways we could go about this, but in the spirit of "for each character on the screen, decide what character it should be", we'll do a character-by-character approach.
The basic algorithm will be, for each (x, y) coordinate of a character:
- Calculate the distance of
(x, y)from the center of the screen: √((x-0)^2 + (y-0)^2), aka √(x^2+y^2) - Subtract the desired circle radius. That way, if the point is inside or on the edge of the circle, the value will be ≤ 0, and otherwise it will be > 0.
- Now test that value against 0 to either return
'#'if the point is inside or on the edge of the circle, or' 'otherwise.
We'll also remap x and y to -1..1 and (-.5)..(.5), respectively, to gesture in the direction of resolution independence, and to keep the aspect ratio correct (2 * 20/80 = 0.5, as y covers only 20 characters while x covers 80, and terminal characters are roughly twice as tall as they are wide). This prevents the circle from looking instead like an unappetizingly squished bean.
import math, time

def circle(x: float, y: float) -> float:
  # since the range of x is -1..1, the circle's radius will be 40%,
  # meaning the circle's diameter is 40% of the screen
  radius = 0.4
  # calculate the distance from the center of the screen and subtract the
  # radius, so d will be < 0 inside the circle, 0 on the edge, and > 0 outside
  return math.sqrt(x**2 + y**2) - radius

def sample(x: float, y: float) -> str:
  # return a '#' if we're inside the circle, and ' ' otherwise
  if circle(x, y) <= 0:
    return '#'
  else:
    return ' '

while True:
  frame_chars = []
  for y in range(20):
    for x in range(80):
      # remap to -1..1 range (for x)...
      remapped_x = x / 80 * 2 - 1
      # ...and corrected for aspect ratio range (for y)
      remapped_y = (y / 20 * 2 - 1) * (2 * 20/80)
      frame_chars.append(sample(remapped_x, remapped_y))
    frame_chars.append('\n')
  print('\033[2J' + ''.join(frame_chars))
  time.sleep(1/30)
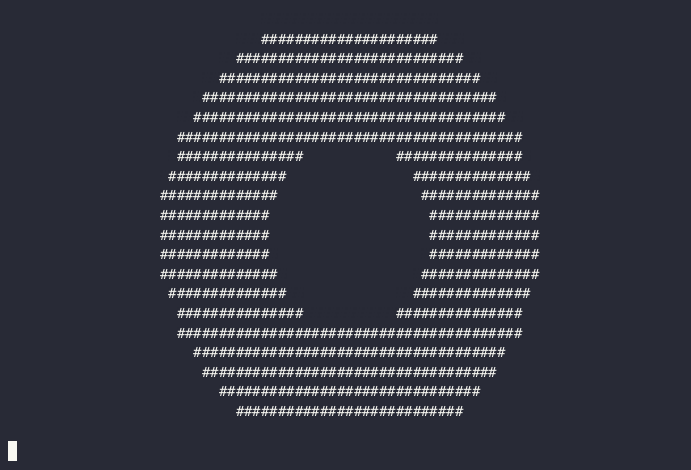
Hey, that's a circle if I've ever seen one!
We didn't use time.time() in this one, so the circle isn't animated—we'll bring animation back later, I promise.
A 2D donut
A circle is just half a 2D donut—the hole is just another circle if you think about it.2 So let's add the other circle to make a 2D donut! There's a few different ways to do this (see if you can figure out a way on your own!), but a nice way is to define it as a radius + thickness around that radius:
import math, time

def donut_2d(x: float, y: float) -> float:
  # same radius as before, though the donut will appear larger as
  # half the thickness is outside this radius
  radius = 0.4
  # how thick the donut will be
  thickness = 0.3
  # take the abs of the circle calculation from before, subtracting
  # `thickness / 2`. `abs(...)` will be 0 on the edge of the circle, and
  # increase as you move away. therefore, `abs(...) - thickness / 2` will
  # be ≤ 0 only `thickness / 2` units away from the circle's edge on either
  # side, giving a donut with a total width of `thickness`
  return abs(math.sqrt(x**2 + y**2) - radius) - thickness / 2


def sample(x: float, y: float) -> str:
  if donut_2d(x, y) <= 0:
    return '#'
  else:
    return ' '

while True:
  frame_chars = []
  for y in range(20):
    for x in range(80):
      remapped_x = x / 80 * 2 - 1
      remapped_y = (y / 20 * 2 - 1) * (2 * 20/80)
      frame_chars.append(sample(remapped_x, remapped_y))
    frame_chars.append('\n')
  print('\033[2J' + ''.join(frame_chars))
  time.sleep(1/30)
This representation (radius + thickness) is artistically nice because radius and thickness are relatively independent parameters: they can be changed with little reference to each other.3
But it's also nice for our code, since it's only a slight tweak from how we were calculating the distance: before, we calculated the distance from the center of the circle, and now we calculate the distance from the edge of that circle.
By subtracting thickness / 2 from that edge distance, the result will be ≤ 0 if the point is less than thickness / 2 from the edge of the circle, resulting in a ring of the given thickness centered on the edge of the circle with the given radius.
The other cool thing is that the tweak was so small that our code was able to stay almost exactly the same. We just had to update the signed distance function—oops, gave it away—and didn't have to change the rest of the rendering loop! More generally, regardless of what SDF we use, our rendering loop can stay the same—we're just sampling distances at pixels.
Going 3D mode
Time to enter the exciting decade of the 1990's and bring 3D graphics to the table! We'll step back from the complexity of the donut slightly and start by rendering a sphere, which has an almost identical SDF to a circle, but with a new term: Z!
def sphere(x: float, y: float, z: float) -> float:
  radius = 0.4
  return math.sqrt(x**2 + y**2 + z**2) - radius
Before, X was the horizontal axis and Y the vertical, Z will give our image depth.4
We'll also re-use the same frame_chars loop as before.
The only function that needs to substantially change is sample, which now needs to handle the third dimension.
Fundamentally, we need a function that takes in an (x, y) 2D point, and samples 3D space in some way related to that point.
In other words, we need to "come up with" the correct Z to sample to get a reasonable character to render.
We could cheat and simply always sample at z = 0: that would render a 2D slice of our 3D world, showing the inside of any object that happened to cross the z=0 plane.5
But to get a more interesting view we need to simulate the real world.
Imagine an eye, which is (to a first approximation) a 2D plane: how does it see distant objects?
Well, the sun shoots out rays, which either hit the eye-plane directly (not good, wear sunglasses folks) or bounce off one or more objects and then hit the eye.
We could treat our screen the same way: for each call to sample(x, y), we'll shoot out millions of rays from a simulated light, hoping that at least one will bounce off an object and pass through (x, y, camera_z).
That approach would be slightly slow, however.
The odds of any given ray hitting that specific point would be vanishingly small, and most of the work would be completely wasted.
You could throw all of us-east-1 at this python code (sorry Reddit, need to borrow your servers for a second), but let's take a shortcut instead.
In sample(x, y), we only care about the ray of light that passes through (x, y, camera_z).
So why bother with all the other rays?
We'll shoot the ray backwards!
We'll start it at (x, y, camera_z), and at each step, query the SDF to get the distance from the ray's current point to the scene (in any direction).
If the distance is less than some threshold, we hit the scene!
Otherwise, we can safely "march" the ray forward by whatever distance is returned, since we know the scene is at least that distance away in the forward direction.
(It may be more—imagine the ray passes close to the scene, but never hits it: while the ray is near the scene, the distance queried from the SDF will be small, so the ray will be forced to move slowly, but eventually after some large number of steps, it will move past the scene and start moving quickly again.)
We'll arbitrarily limit the number of marches (steps) to 30 and return the background character if a ray doesn't hit something by then.
With all of that, this is what our new, 3D sample function looks like:
def sample(x: float, y: float) -> str:
  # start `z` far back from the scene, which is centered at 0, 0, 0,
  # so nothing clips
  z = -10
  # we'll step at most 30 steps before assuming we missed the scene
  for _step in range(30):
    # get the distance, just like in 2D
    d = sphere(x, y, z)
    # test against 0.01, not 0: we're a little more forgiving with the distance
    # in 3D for faster convergence
    if d <= 0.01:
      # we hit the sphere!
      return '#'
    else:
      # didn't hit anything yet, move the ray forward
      # we can safely move forward by `d` without hitting anything since we know
      # that's the distance to the scene
      z += d
  # we didn't hit anything after 30 steps, return the background
  return ' '
And putting it all together, here's the code for rendering a sphere!
import math, time

def sphere(x: float, y: float, z: float) -> float:
  radius = 0.4
  return math.sqrt(x**2 + y**2 + z**2) - radius

def sample(x: float, y: float) -> str:
  radius = 0.4
  z = -10
  for _step in range(30):
    d = sphere(x, y, z)
    if d <= 0.01:
      return '#'
    else:
      z += d
  return ' '

# this is unchanged
while True:
  frame_chars = []
  for y in range(20):
    for x in range(80):
      remapped_x = x / 80 * 2 - 1
      remapped_y = (y / 20 * 2 - 1) * (2 * 20/80)
      frame_chars.append(sample(remapped_x, remapped_y))
    frame_chars.append('\n')
  print('\033[2J' + ''.join(frame_chars))
  time.sleep(1/30)
OK, this isn't very impressive, I admit it. If you didn't know any better, you'd probably accuse me of just re-using the circle image from before! But I promise this is a sphere, really—let's keep moving and trust, for now, that it's 3D.
A 3D donut
To move towards our 3D donut, next we'll need to replace the simple sphere SDF with the more complex torus donut SDF.
The rest of the code stays the same:
import math, time

def donut(x: float, y: float, z: float) -> float:
  radius = 0.4
  thickness = 0.3
  # first, we get the distance from the center and subtract the radius,
  # just like the 2d donut.
  # this value is the distance from the edge of the xy circle along a line
  # drawn between [x, y, 0] and [0, 0, 0] (the center of the donut).
  xy_d = math.sqrt(x**2 + y**2) - radius

  # now we need to consider z, which, since we're evaluating the donut at
  # [0, 0, 0], is the distance orthogonal (on the z axis) to that
  # [x, y, 0]..[0, 0, 0] line.
  # we can use these two values in the usual euclidean distance function to get
  # the 3D version of our 2D donut "distance from edge" value.
  d = math.sqrt(xy_d**2 + z**2)

  # then, we subtract `thickness / 2` as before to get the signed distance,
  # just like in 2D.
  return d - thickness / 2

# unchanged from before, except for s/sphere/donut/g:
def sample(x: float, y: float) -> str:
  z = -10
  for _step in range(30):
    d = donut(x, y, z)
    if d <= 0.01:
      return '#'
    else:
      z += d
  return ' '

while True:
  frame_chars = []
  for y in range(20):
    for x in range(80):
      remapped_x = x / 80 * 2 - 1
      remapped_y = (y / 20 * 2 - 1) * (2 * 20/80)
      frame_chars.append(sample(remapped_x, remapped_y))
    frame_chars.append('\n')
  print('\033[2J' + ''.join(frame_chars))
  time.sleep(1/30)
As before, this donut isn't very impressive, but since it's not symmetrical we can now add some motion to prove it's 3D.
A 3D donut that really spins!
All we need to do to make the donut spin is transform the points in sample before we evaluate the SDF:
def sample(x: float, y: float) -> str:
  ...
  for _step in range(30):
    # calculate the angle based on time, to animate the donut spinning
    θ = time.time() * 2
    # rotate the input coordinates, which is equivalent to rotating the sdf
    t_x = x * math.cos(θ) - z * math.sin(θ)
    t_z = x * math.sin(θ) + z * math.cos(θ)
    d = donut(t_x, y, t_z)
    ...
This will rotate the donut around the y axis, which is why y is unchanged.
We calculate θ6 per-sample7, and then calculate a rotation matrix by hand because I'm too lazy to import numpy real programmers don't use dependencies 😎.
Here it is in-context:
import math, time

def donut(x: float, y: float, z: float) -> float:
  radius = 0.4
  thickness = 0.3
  return math.sqrt((math.sqrt(x**2 + y**2) - radius)**2 + z**2) - thickness / 2

def sample(x: float, y: float) -> str:
  z = -10
  for _step in range(30):
    θ = time.time() * 2
    t_x = x * math.cos(θ) - z * math.sin(θ)
    t_z = x * math.sin(θ) + z * math.cos(θ)
    d = donut(t_x, y, t_z)
    if d <= 0.01:
      return '#'
    else:
      z += d
  return ' '

while True:
  frame_chars = []
  for y in range(20):
    for x in range(80):
      remapped_x = x / 80 * 2 - 1
      remapped_y = (y / 20 * 2 - 1) * (2 * 20/80)
      frame_chars.append(sample(remapped_x, remapped_y))
    frame_chars.append('\n')
  print('\033[2J' + ''.join(frame_chars))
  time.sleep(1/30)
See, that's definitely 3D, no nits about it! But since we're only at 32 lines (count em'!), let's kick it up a notch and add some simple lighting and texturing with a normal vector estimator.
Lighting it up and adding frosting
To add lighting and a frosting texture, we'll need to calculate normal vectors for our scene. A normal8 vector is defined for an object at every point on that object's surface, and is the vector that sticks "straight out" from that point—imagine the spines on a cactus, or someone's hair after touching a staticy balloon.
Most surfaces have an analytic way to calculate the normal vector, but that can get difficult when you start combining multiple SDFs into a complex scene. Plus, who wants to write out a normal function for each SDF they write? That sucks! So we can cheat and instead estimate the normal by sampling the SDF on each axis around a target point:
Sdf = typing.Callable[[float, float, float], float]
def normal(sdf: Sdf, x: float, y: float, z: float) -> tuple[float, float, float]:
  # an arbitrary small amount to offset around the point
  ε = 0.001
  # calculate each axis independently
  n_x = sdf(x + ε, y, z) - sdf(x - ε, y, z)
  n_y = sdf(x, y + ε, z) - sdf(x, y - ε, z)
  n_z = sdf(x, y, z + ε) - sdf(x, y, z - ε)
  # normalize the result to length = 1
  norm = math.sqrt(n_x**2 + n_y**2 + n_z**2)
  return (n_x / norm, n_y / norm, n_z / norm)
To make sense of how this function works, imagine the case where a component of the normal, say x, is 0.
That means the SDF at that point is flat on the x axis, so sdf(x + ε, y, z) == sdf(x - ε, y, z).
As those values diverge, the x component of the normal will grow either more positive or negative, rotating it around.
It's just an estimation, but for rendering it's usually good enough, and even advanced demos will often use it.
The downside is it can be quite slow, since it needs to sample the SDF six times for every call!
As the scene SDF grows more complicated, that can become a big performance drain.
But for us it's good enough!
We'll calculate the normal in sample if the ray hits, and use it to compute some lighting and texturing:
if d <= 0.01:
  _, nt_y, nt_z = normal(donut, t_x, y, t_z)
  is_lit = nt_y < -0.15
  is_frosted = nt_z < -0.5

  if is_frosted:
    return '@' if is_lit else '#'
  else:
    return '=' if is_lit else '.'
We don't care about the x component of the normal, just y and z. We'll use y to calculate the lighting, assuming that if a surface is facing up (the normal's y is close to -1), it should be lit. We'll use z to show the frosting—by thresholding against different values, we can make the donut more or less frosted. The best way to gain an intuition for what these values mean is to play with them, so try changing them around in a local copy of the code below and watch what happens!
import math, time, typing

def donut(x: float, y: float, z: float) -> float:
  radius = 0.4
  thickness = 0.3
  return math.sqrt((math.sqrt(x**2 + y**2) - radius)**2 + z**2) - thickness / 2

Sdf = typing.Callable[[float, float, float], float]
def normal(sdf: Sdf, x: float, y: float, z: float) -> tuple[float, float, float]:
  ε = 0.001
  n_x = sdf(x + ε, y, z) - sdf(x - ε, y, z)
  n_y = sdf(x, y + ε, z) - sdf(x, y - ε, z)
  n_z = sdf(x, y, z + ε) - sdf(x, y, z - ε)
  norm = math.sqrt(n_x**2 + n_y**2 + n_z**2)
  return (n_x / norm, n_y / norm, n_z / norm)

def sample(x: float, y: float) -> str:
  z = -10
  for _step in range(30):
    θ = time.time() * 2
    t_x = x * math.cos(θ) - z * math.sin(θ)
    t_z = x * math.sin(θ) + z * math.cos(θ)
    d = donut(t_x, y, t_z)
    if d <= 0.01:
      _, nt_y, nt_z = normal(donut, t_x, y, t_z)
      is_lit = nt_y < -0.15
      is_frosted = nt_z < -0.5

      if is_frosted:
        return '@' if is_lit else '#'
      else:
        return '=' if is_lit else '.'
    else:
      z += d
  return ' '

while True:
  frame_chars = []
  for y in range(20):
    for x in range(80):
      remapped_x = x / 80 * 2 - 1
      remapped_y = (y / 20 * 2 - 1) * (2 * 20/80)
      frame_chars.append(sample(remapped_x, remapped_y))
    frame_chars.append('\n')
  print('\033[2J' + ''.join(frame_chars))
  time.sleep(1/30)
There's our final 3D donut, lit, textured, and spinning as promised, in only 46 lines of code! Thanks for sticking through, and I hope this article is inspiring to try and make your own SDF creations. If you're interested in learning more about SDFs, there are many resources online, but none I could recommend more highly than Inigo Quilez's website—he is an SDF master and has made some truly mind-blowing art using SDFs. He also has a Youtube channel where he posts videos of his work and tutorials. I recommend this video where he makes a landscape using SDFs. Enjoy, and thanks for reading to the end!
Though a cool one that's worth learning!
Technically, a 2D donut is a circle minus a circle, so a donut = circle - circle = 0. And a donut is shaped like a 0... coincidence? I think not!
If you instead, for example, defined the donut as two radii where a point is filled if inner_radius ≤ distance from center ≤ outer_radius, you permit a nonsense construction where inner_radius > outer_radius.
vgel.me is a bastion of the Y-up (that is to say, correct) way of rendering.
This is how many "4D" games work: they render a 3D slice of a 4D world (and then, confusingly, render that 3D slice to a 2D screen...). That slicing has always sort of bothered me, since it allows you to see "inside" objects in a way a real 4D being couldn't. I've experimented with, and one day want to publish or see made, a 4D game that does 4D raymarching to generate a 3D mesh and then renders that mesh, so you can only see the surfaces of 4D objects, not their interiors.
Yes, I could have just written theta, but I installed a polytonic Greek IME for language study, and the installation process was sufficiently annoying that I intend to get as much use out of it as possible :-)
...which means if sample was sufficiently slow there would be an interesting warp effect. You can emulate this without making things actually slow with θ = time.time()*2 + (x+y*80)/15, which looks really cool. Try ... + (x+y*80)/15*math.sin(time.time()) for some even trippier visuals!
"normal" in this context being based on the original meaning of the Latin word normālis, right-angled, from norma, a carpenter's square. The more common use of normal to mean "regular" or "as it ought to be" was a metaphorical extension of that older meaning—sort of like the much newer phrase "squared away". It's like poetry, it rhymes :-)